Using a Bootstrap LESS Subtheme with Drupal 7
Written by Mark Chambers onOverview
- Install LESS Compiler
- Create the subtheme
- Download Bootstrap source
- Compile the LESS files
- Enable Your Subtheme
- Copy template files from the parent theme (Optional)
- Closing
1: Install LESS Compiler
These instructions are for Ubuntu 12.04 LTS. It may need to be slightly adjusted for other versions of Linux.
1.1: Install NVM (Node Version Manager)
Install a C++ Compiler
As a matter of best practice we’ll update our packages:
sudo apt-get update
The build-essential package should already be installed, however, we’re going still going to include it in our command for installation:
sudo apt-get install build-essential libssl-dev
Install NVM (Node Version Manager)
Use the following curl command to kick-off the install script:
curl -o- https://raw.githubusercontent.com/creationix/nvm/v0.32.1/install.sh | bash
At the time of publication, NVM v0.32.1 was the most recent version available. You should check the GitHub project page for the latest release of NVM, and adjust the above command to include the newest (or another specific) version.
After running the above command, you may receive output similar to the following:
Close and reopen your terminal to start using nvm
Either do as the output suggests, and close and reopen your terminal session, or run the following command:
source ~/.profile
Verify the Installation
We can quickly verify that NVM is now installed and working properly with the following command:
nvm --version
Which in this case would yield a result of:
0.32.1
Another very useful command to get you started on Node.js management is:
nvm help
1.2: Install Node.js via NVM
Check Available Node.js Versions
Versions that are available for installation:
nvm ls-remote
To download, compile, and install the latest LTS release:
nvm install --lts
Note: If you want the latest stable release, then it’s simply nvm install latest.
If you see the message nvm_ensure_default_set: a version is required then run this:
nvm alias default 6.9.1
Now to display currently activated version run:
nvm current
Which gives the output:
v6.9.1
In this case I am now running v6.9.1.
nvm ls
Gives the following output:
->       v6.9.1

default -> 6.9.1 (-> v6.9.1)

node -> stable (-> v6.9.1) (default)

stable -> 6.9 (-> v6.9.1) (default)

iojs -> N/A (default)

lts/* -> lts/boron (-> v6.9.1)

lts/argon -> v4.6.2 (-> N/A)

lts/boron -> v6.9.1
And finally, if you want to modify PATH to use another installed version, use the following command:
nvm use x.x.x
Which returns:
Now using node vx.x.x
1.3: Install Grunt
From the command line:
Install grunt-cli globally with:
npm install -g grunt-cli
When completed, you'll be able to run the various Grunt commands provided from the command line that we will need in Step 4.
2: Create Bootstrap Subtheme
2.1: Get latest Bootstrap Theme
Download the Drupal Bootstrap theme
Extract/upload to
sites/all/themes
There is no need to activate the theme. We only need this to set up the subtheme.
2.2: Create the subtheme directory and copy files
Create a new folder for your subtheme inside
sites/all/themes
In our example, we’ll call our subtheme
my_subtheme
So we should have an empty directory at
sites/all/themes/my_subtheme
Copy all the files from
sites/all/themes/bootstrap/starterkits/less
to
sites/all/themes/my_subtheme
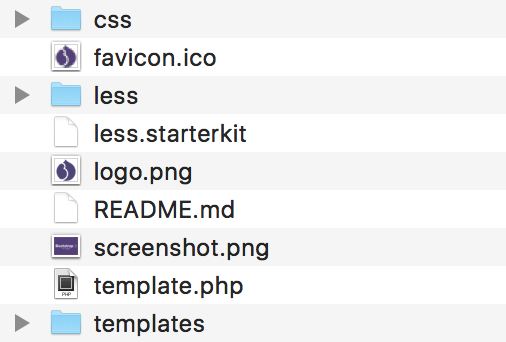
Your subtheme directory should look like this:
2.3: Configure your .info file
Rename
less.starterkit
to
my_subtheme.info
Remember to replace “my_subtheme” with the name of your own subtheme.
Edit my_subtheme.info with your text/code editor of choice and give it a unique name and description:
name = My LESS Bootstrap subtheme
description = A Bootstrap subtheme for my project
core = 7.x
base theme = bootstrap
Uncomment scripts files
Since we’re going to compile from source and NOT use the default Bootstrap CDN, uncomment all the “Scripts” section by removing the semicolons ; in front of each of the javascript files:
scripts[] = 'bootstrap/js/affix.js'

scripts[] = 'bootstrap/js/alert.js'

scripts[] = 'bootstrap/js/button.js'

scripts[] = 'bootstrap/js/carousel.js'

scripts[] = 'bootstrap/js/collapse.js'

scripts[] = 'bootstrap/js/dropdown.js'

scripts[] = 'bootstrap/js/modal.js'

scripts[] = 'bootstrap/js/tooltip.js'

scripts[] = 'bootstrap/js/popover.js'

scripts[] = 'bootstrap/js/scrollspy.js'

scripts[] = 'bootstrap/js/tab.js'

scripts[] = 'bootstrap/js/transition.js'
Disable Bootstrap CDN
Remove the semicolon in front of:
settings[bootstrap_cdn] = ''
3: Download Bootstrap source
Download Bootstrap source, extract the files and rename the base directory to
bootstrap
Upload the whole directory to your subtheme folder. It should look like this when you’re done:
my_subtheme/
├─ my_subtheme.info
├─ bootstrap/
  ├─ dist/
    ├─ css/
    ├─ fonts/
    └─ js/
  ├─ docs/
  ├─ fonts/
  ├─ js/
  ├─ less/
  └─ (etc.)
├─ css/
├─ less/
├─ templates/
├─ README.md
├─ template.php
└─ (etc.)
The only folders you need from source are:
less
js
fonts
The rest is optional, but it doesn’t hurt to have them in there.
4: Compile the LESS files
Navigate to the root /bootstrap directory.
In Drupal 7 on Ubuntu 14.04 LTS this is going to be:
cd /var/www/html/sites/all/themes/bootstrap
Then run:
npm install
npm will look at the package.json file and automatically install the necessary local dependencies listed there.
Just compile CSS and JavaScript
grunt dist
Regenerates the /dist/ directory with compiled and minified CSS and JavaScript files. As a Bootstrap user, this is normally the command you want.
Other Grunt commands
Here is a list of other available Grunt commands.
Troubleshooting
Should you encounter problems with installing dependencies or running Grunt commands, first delete the
/node_modules/
directory generated by npm. Then, rerun:
npm install
5: Enable jQuery 1.10
Download/Enable jQuery Update
Extract/upload to your sites/all/modules
Set the “Default jQuery Version” to 1.10
Set “Alternate jQuery version” to 1.5 (This prevents issues with AJAX heavy modules like Views)